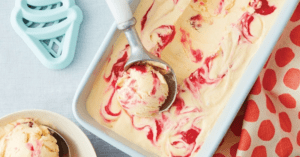
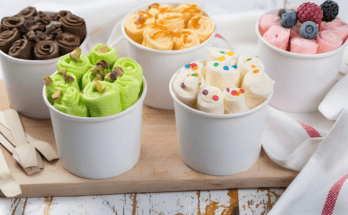
Homemade ice cream is one of the simple pleasures in life. There’s nothing like making rich, creamy, and full-flavored ice cream at home with a Nostalgia Ice Cream Maker Recipes.
Suitable for ice cream aficionados and novices alike, the Nostalgia ice cream maker makes it simple and fun to try all kinds of flavors. We are sharing some recipes for Nostalgia ice cream maker.
Why Choose a Nostalgia Ice Cream Maker?
Homemade ice cream can be customized to suit your taste, from natural ingredients for a healthier option. Cooking with fresh produce, be it seasonal fruits or organic dairy and eggs can make a huge difference to the taste of your ice cream as well as add nutritional value.
Nostalgia makes all kinds of machines, from small batch models to larger ones. The Nostalgia Ice Cream Maker brings nostalgia, fun, and excitement to making your ice cream at home whether hosting a party, preparing a family treat, or just on a quiet night.
Easy-to-Use Design for All Ages
Nostalgia ice cream makers are made for anyone to use. Whether you are a child or an adult, making homemade ice cream is fun for everyone involved in the process.
The machines are very easy to use with maybe 3 ingredients and then you just have to wait for the ice cream to freeze. The majority of models come with simple instructions, meaning you’ll be up and running in no time.
Love sweet ice cream recipes with yummy add-ins like this marshmallow ice cream?
You’ll want to try this Neapolitan Ice Cream next. Our Chocolate Marshmallow Ice Cream is also super dreamy.
If you prefer a more simple ice cream recipe, try this one for Jasmine Ice Cream
Top Nostalgia Ice Cream Maker Recipes for Beginners
Classic Vanilla Ice Cream
Nothing beats a scoop of classic vanilla ice cream and with a Nostalgia ice cream maker, it’s straightforward to make. This recipe is a perfect starting point for beginners. Here’s how to make it:
Ingredients:
- 2 cups heavy cream
- 1 cup whole milk
- ¾ cup granulated sugar
- 1 tablespoon vanilla extract
- Pinch of salt
Instructions:
-
In a medium mixing bowl, combine heavy cream, milk, sugar, vanilla extract, and salt. Whisk until the sugar is dissolved.
-
Pour the mixture into the Nostalgia ice cream maker and turn it on.
-
Let the machine churn for about 20-25 minutes or until the ice cream reaches your desired consistency.
-
Serve immediately for a soft-serve style, or freeze for a firmer texture.
Chocolate Fudge Ice Cream
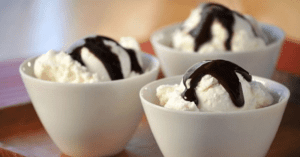
Chocolate lovers will fall in love with this rich and creamy chocolate fudge ice cream recipe. The deep, velvety chocolate flavor pairs perfectly with the creaminess of homemade ice cream.
Ingredients:
- 2 cups heavy cream
- 1 cup whole milk
- ½ cup cocoa powder
- ¾ cup granulated sugar
- ½ cup chocolate chips
- 1 teaspoon vanilla extract
Instructions:
-
In a mixing bowl, whisk together cream, milk, cocoa powder, sugar, and vanilla extract.
-
Heat the mixture over low heat until the sugar dissolves and the cocoa is fully incorporated.
-
Pour the mixture into the **Nostalgia ice cream maker** and churn for about 20-25 minutes.
-
Add the chocolate chips during the last 5 minutes of churning.
Discover the Best Nostalgia Ice Cream Maker Flavors for Summer
Summer is the perfect time for homemade ice cream, and this headline will capture readers’ interest by suggesting the best flavors to make. The focus is on seasonal ingredients like fresh fruits, which are ideal for creating refreshing ice cream during hot weather.
By sharing a variety of popular summer flavors, readers can find inspiration for their next ice cream batch. This section will highlight fruity, light, and cool recipes, making it the go-to resource for those wanting to indulge in a cold treat under the sun.
Flavorful Variations You Can Make with Your Nostalgia Ice Cream Maker
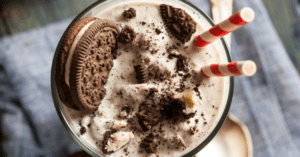
Cookies and Cream Ice Cream
A fun twist on the classic vanilla, cookies, and cream ice cream is a crowd favorite. The crispy, chocolatey crunch of Oreo cookies makes this flavor irresistible.
Ingredients:
-
- 2 cups heavy cream
- 1 cup whole milk
- ¾ cup granulated sugar
- 1 tablespoon vanilla extract
- 10-12 Oreo cookies, crushed
-
Instructions:
-
Combine cream, milk, sugar, and vanilla extract in a bowl. Whisk until smooth.
-
Pour the mixture into the Nostalgia ice cream maker and churn for 15 minutes.
-
Add the crushed Oreos and continue churning for another 10 minutes.
Fresh Strawberry Ice Cream

nostalgia ice cream maker recipes Nothing says summer like fresh strawberry ice cream. With the Nostalgia ice cream maker, this refreshing treat is simple to make using fresh, ripe strawberries.
Ingredients:
-
- 2 cups fresh strawberries, chopped
- 1 cup heavy cream
- 1 cup whole milk
- ¾ cup granulated sugar
- 1 teaspoon lemon juice
Instructions:
-
Mash the strawberries with sugar and lemon juice. Let it sit for 10 minutes to release juices.
-
Combine the strawberry mixture with cream and milk in a bowl.
-
Pour into the Nostalgia ice cream maker and churn for 20-25 minutes.
Why Nostalgia Ice Cream Maker Recipes Are Perfect for Family Fun
This headline focuses on the family-friendly nature of Nostalgia ice cream maker recipes. It emphasizes the joy of making ice cream together, making it an enjoyable bonding activity. Families can create ice cream in different flavors and share the fun, catering to everyone’s preferences.
The Nostalgia ice cream maker is user-friendly, allowing even younger members of the family to participate by adding their favorite ingredients and flavors. It’s a great way to introduce children to the art of making their treats.
Dairy-Free Nostalgia Ice Cream Maker Recipes

nostalgia ice cream maker recipes Coconut Milk Ice Cream
For those who prefer a dairy-free option, coconut milk ice cream is a rich and creamy alternative that’s perfect for your Nostalgia ice cream maker.
Ingredients:
- 2 cans coconut milk (full-fat)
- ¾ cup sugar
- 1 tablespoon vanilla extract
Instructions:
-
Mix the coconut milk, sugar, and vanilla extract in a bowl.
-
Pour the mixture into the Nostalgia ice cream maker and churn for 20-25 minutes.
-
Serve immediately or freeze for a firmer texture.
Vegan Strawberry Sorbet

Nostalgia Ice Cream Maker recipes If you’re avoiding dairy altogether, try making a refreshing vegan strawberry sorbet using your Nostalgia ice cream maker. This sorbet is bursting with fresh fruit flavors.
Ingredients:
- 3 cups fresh strawberries
- ½ cup water
- ¾ cup sugar
Instructions:
-
Blend the strawberries with water and sugar until smooth.
-
Pour the mixture into the Nostalgia ice cream maker and churn for 15-20 minutes.
-
Serve immediately for a soft sorbet or freeze for a firmer texture.
Vegan and Dairy-Free Ice Cream Recipes with Nostalgia Ice Cream Maker
Catering to the growing demand for vegan and dairy-free options, this headline appeals to those who are looking for plant-based alternatives. The Nostalgia ice cream maker is perfect for making creamy dairy-free ice creams and recipes like coconut milk and sorbet offer a variety of options.
In this section, we will highlight delicious recipes that are both vegan and dairy-free, without compromising on taste. These plant-based ice cream options are not only suitable for those with dietary restrictions but also great for anyone who loves trying new flavors.
Advanced Nostalgia Ice Cream Maker Recipes

nostalgia ice cream maker recipes Custard-Style Vanilla Ice Cream
Custard-style vanilla ice cream offers a rich and creamy texture for those who want to take their homemade ice cream to the next level. This recipe requires cooking a custard base before churning in the Nostalgia ice cream maker.
Ingredients:
- 2 cups heavy cream
- 1 cup whole milk
- ¾ cup sugar
- 5 egg yolks
- 1 tablespoon vanilla extract
Instructions:
-
Heat the milk and cream in a saucepan until warm, but not boiling.
-
Whisk the egg yolks and sugar together, then slowly add the warm cream mixture.
-
Return the mixture to the pan and cook until it thickens to a custard consistency.
-
Let the custard cool, then pour into the Nostalgia ice cream maker and churn for 25-30 minutes.
Salted Caramel Ice Cream
Sweet and salty lovers will adore salted caramel ice cream. It’s a rich, decadent treat that balances the deep flavor of caramel with the tang of sea salt.
Ingredients:
- 2 cups heavy cream
- 1 cup whole milk
- ¾ cup sugar
- 1 cup caramel sauce
- 1 teaspoon sea salt
Instructions:
-
Combine cream, milk, sugar, and caramel sauce in a bowl.
-
Pour the mixture into the Nostalgia ice cream maker and churn for 20-25 minutes.
-
Sprinkle sea salt over the ice cream before serving for that perfect salty-sweet finish.
How does the Ice Cream Maker Work?
The Nostalgia ice cream maker churns your ice cream base, introducing air and incorporating the right amount of cold to ensure the right texture. The freezing drum and paddle work together to create that perfect, smooth consistency.
Tips for the Perfect Ice Cream Texture
- Don’t over-churn: Stop the machine once your ice cream reaches the consistency you desire.
- Use cold ingredients: Start with chilled cream, milk, and other ingredients to speed up the freezing process.
- Consistency check: If your ice cream feels too soft, pop it into the freezer for an hour or so before serving.
How to Store Ice Cream from Your Nostalgia Ice Cream Maker
Homemade ice cream doesn’t have the same preservatives as store-bought ice cream, so it’s best to store it in airtight containers to prevent ice crystals from forming. Make sure to smooth the surface of the ice cream before sealing the container to avoid air pockets.
Serving Suggestions for Homemade Ice Cream
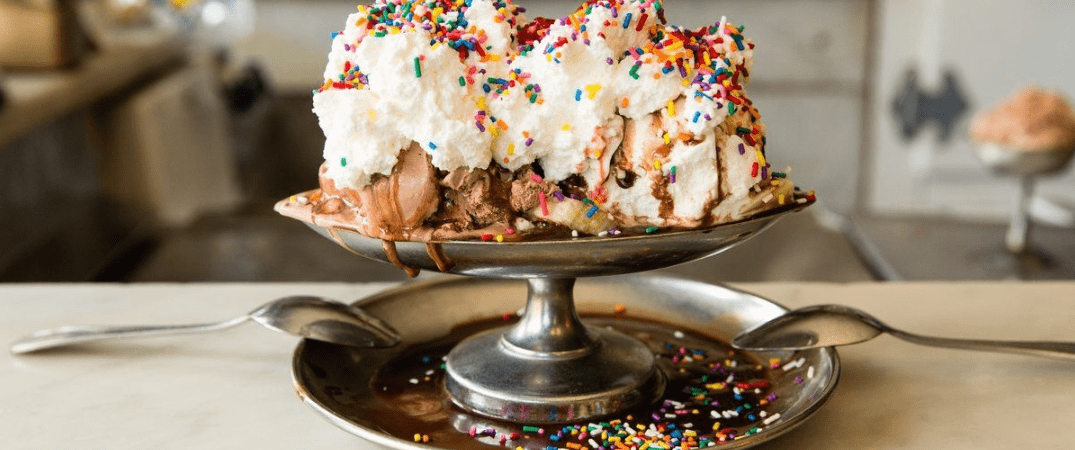
Try serving your homemade ice cream with fresh toppings such as chocolate syrup, sprinkles, crushed cookies, or whipped cream. The possibilities are endless.
Innovative Nostalgia Ice Cream Maker Recipes: From Salty Caramel to Tropical Delights
This headline grabs attention by offering innovative ice cream recipes that push the boundaries of traditional flavors. Unique combinations, such as salted caramel or tropical fruit blends, are ideal for those looking to add a twist to their usual ice cream routine.
In this section, we’ll introduce some creative recipes that go beyond the classics. From rich caramel ice cream with a dash of sea salt to tropical fruit sorbets bursting with flavor, these recipes will inspire readers to experiment with exciting and unusual flavor combinations.
FAQ’s
How Long Should I Churn My Ice Cream in the Nostalgia Ice Cream Maker?
Churning times can vary depending on your recipe, but in general, the Nostalgia ice cream maker takes about 20-25 minutes to churn ice cream.
Can I Use My Ingredients with the Nostalgia Ice Cream Maker?
Yes! The Nostalgia ice cream maker is incredibly versatile and can handle various ingredients, from fruits and nuts to dairy and non-dairy alternatives.
How Do I Clean My Nostalgia Ice Cream Maker?
Detach the removable parts, wash them with warm, soapy water, and wipe the machine’s exterior with a damp cloth. Thoroughly dry before storing.
Conclusion
Making homemade ice cream in a Nostalgia ice cream maker is simple and rewarding. The Nostalgia ice cream maker recipes can help you create timeless treats, whether you’re beating up old-fashioned vanilla or trying out new flavors of salted caramel, or coconut milk ice cream, the options are limitless for kids. So, what are you waiting for? So, do start making your favorite ice cream today.
More Homemade Ice Cream Recipes
- Cuisinart Soft Serve Ice Cream
- Tillamook ice cream
- Cuisinart Ice Cream Recipe Vanilla
- Butter Brickle Ice Cream Recipe
- Cardamom Ice Cream Recipe
- Chocolate Ice Cream with a Cuisinart
- Cuisinart Coffee Ice Cream Recipe
- Grapenut Ice Cream Recipe
-

